
Tutorial
If you've never edited a video this may take 10-15 minutes the first time, after that it should only take you a couple minutes. This tutorial is divided into very small steps for clarity, but the end goal is simple: You're going to combine the XML file you download from BestEdit with the video file(s) of your movie/TV show. The BestEdit XML file will tell your editing program where to put the cuts, fades, and transitions, giving you a fully edited video without having to do any editing yourself!
This tutorial uses Adobe Premiere Pro, if you don't own it and would like a free option you can try the DaVinci Resolve tutorial instead. It isn't quite as fast or easy as using Premiere, but it won't cost you any money.
1. Make sure the Original movie/episode video file you're trying to edit is the correct length.
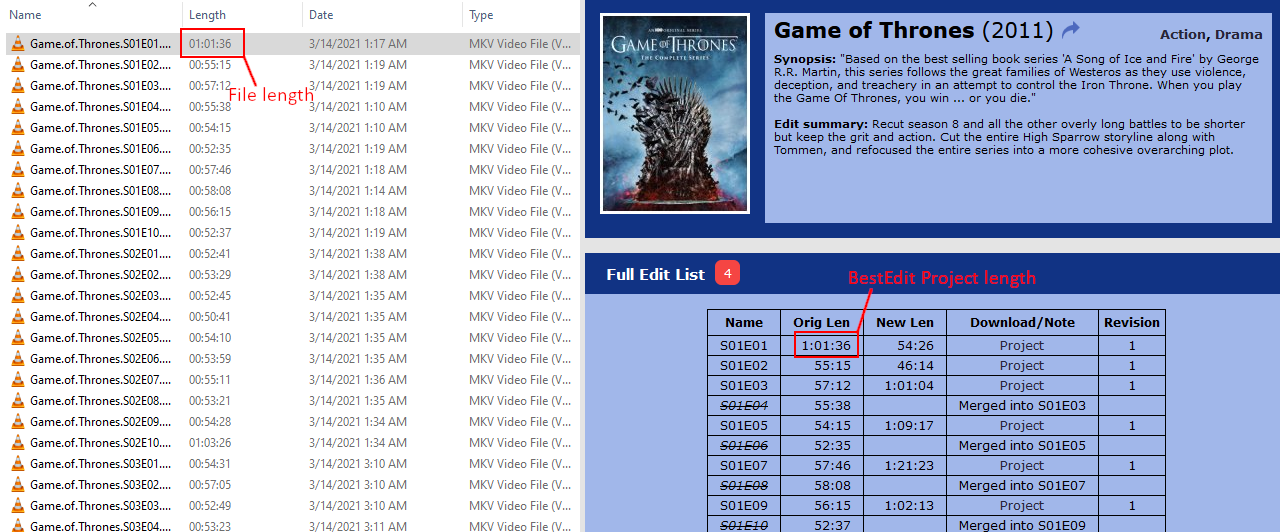
There is an Original length listed on each BestEdit movie/show page. You can't use an edit done on a Theatrical release to edit a Director's cut source file, you need the same release length for the edits to match up at the correct spots. (if your movie file is close but not exactly the correct length you can Calibrate it to match later in this tutorial)
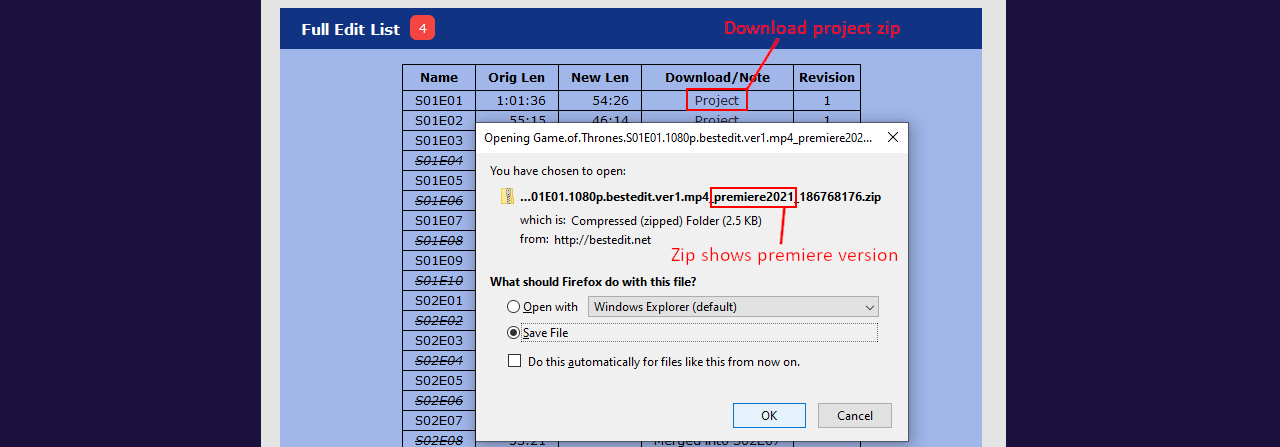
2. Download the BestEdit Project zip file for the movie or TV show you want to watch
Please note, each zip file specifies a version of Adobe Premiere. You can use the projects on a different Premiere Pro version, but we've noticed that it may be 1 frame off in some tight edits, so we recommend that you encode a Premiere 2019 project in 2019 to avoid any minor quality issues caused by using a different version than it was created with. You may not experience issues, but better safe than sorry.
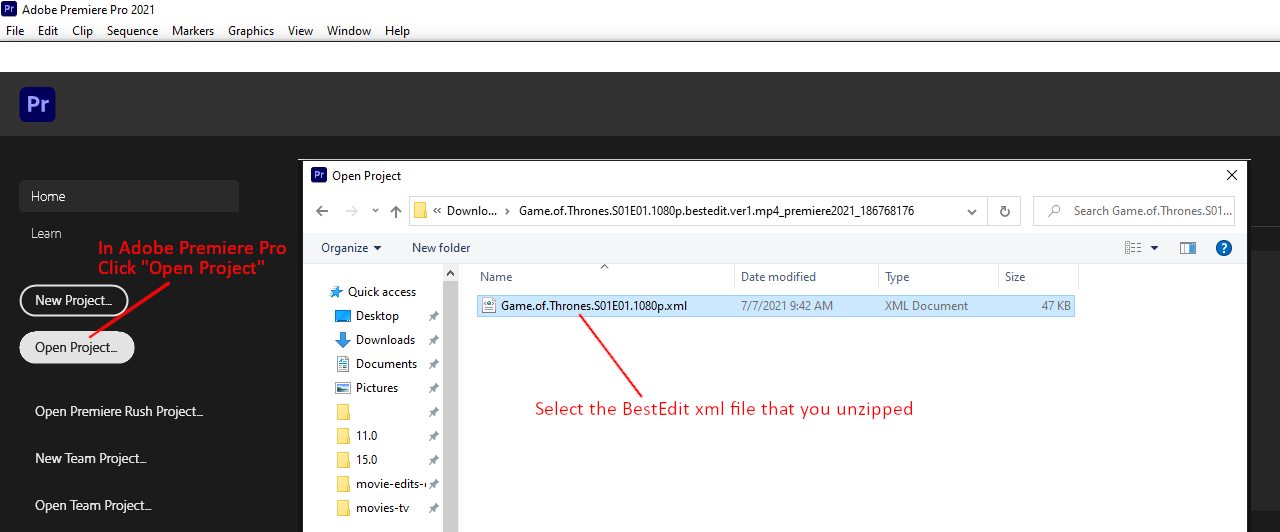
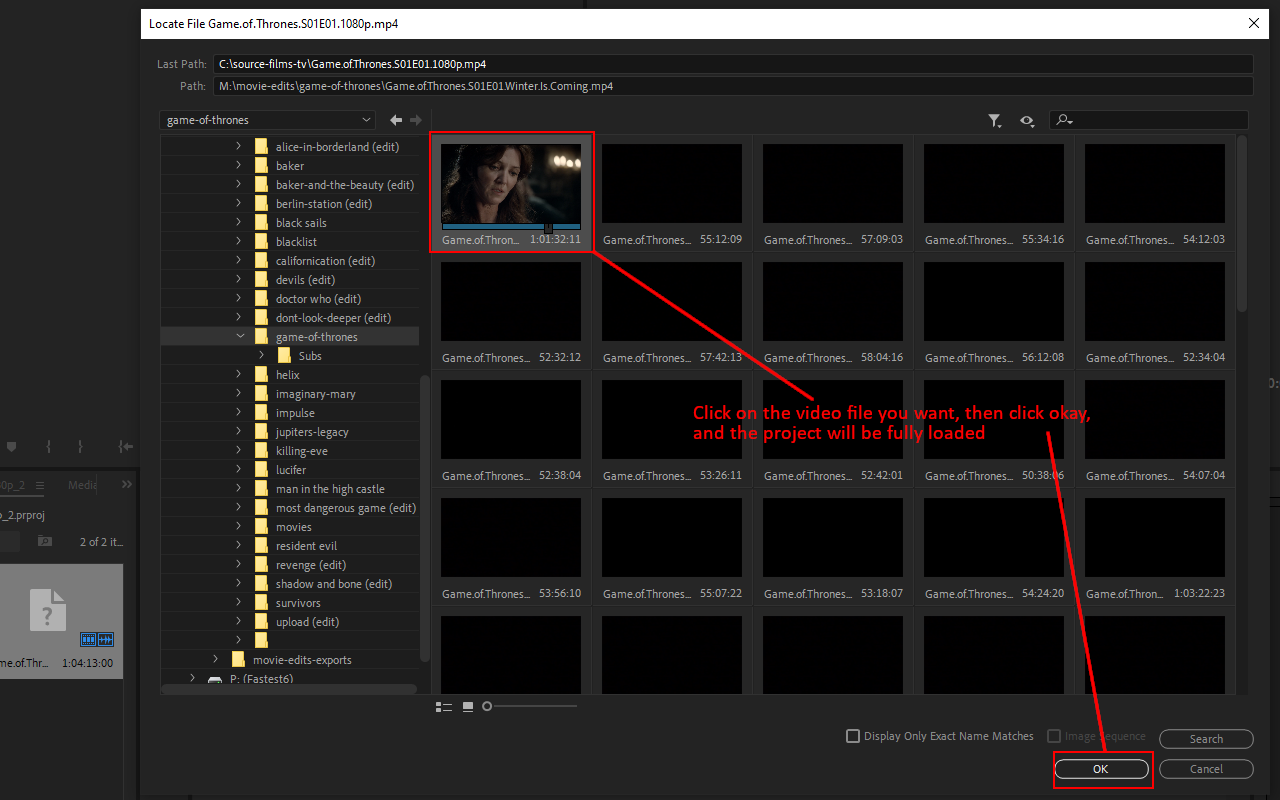
3a. Unzip the Project file and open the XML Project in the correct version of Adobe Premiere Pro, it will prompt you to select your video source files (if you put them in C:\source-films-tv\ the videos may be detected automatically, since that's the default path in all Project files)
Note: Adobe Premiere generally doesn't like mkv files, you may need to convert files to mp4 if your source files won't work in Adobe Premiere

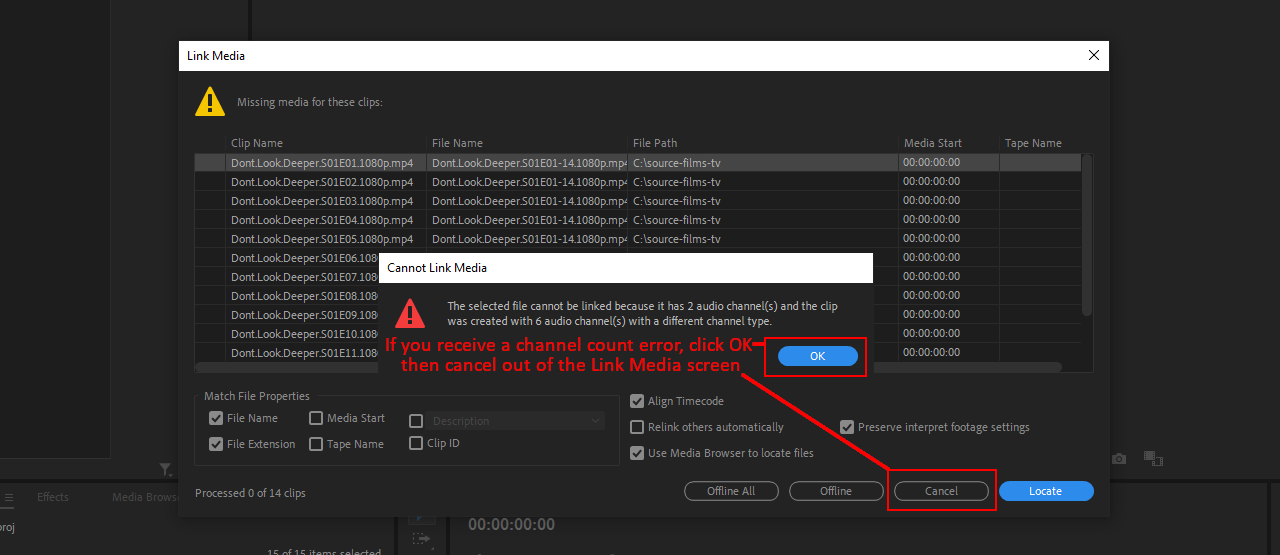
3b. If you receive an error that says your source file has a different number of audio channels, don't worry. Just follow the alternate instructions for this step:
Cancel out of the Link Media screen.
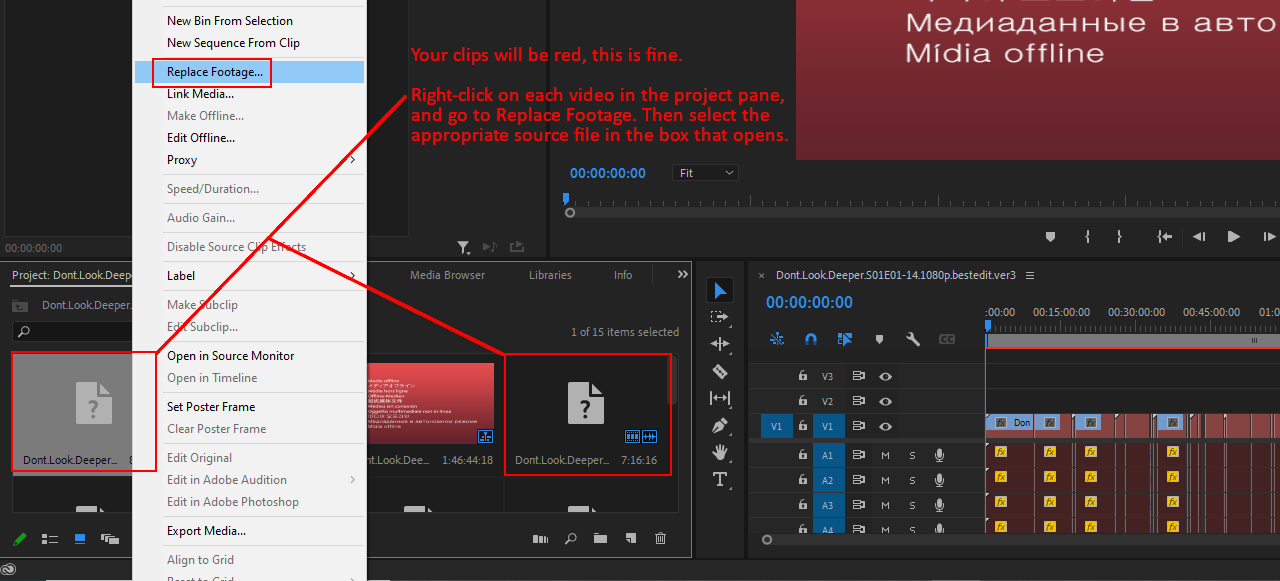
This will leave you with red (offline) files, but that's okay. All you need to do is right-click each video file in the Project Pane and select the Replace Footage option. Then choose the same file gave you the error and it will load fine. Repeat with any other offline video files, once they're all online you can proceed to the final step.
4. At this point you may want to check the Calibration marks to make sure everything in the project lines up correctly. This is optional, but it's a good double-check so you don't have to go back and fix anything later.
5. Choose your output quality and encode the video, you shouldn't have to change any settings.
Please note, if you use a different resolution source video than the Project indicates (4k video for a 1080p project), you'll need to copy the edit to a new sequence with the appropriate resolution after you've loaded the source files. This should work relatively seamlessly, although infrequently Premiere will delete a transition when you copy and paste, so if you notice a rough cut go back and check, that's most likely what happened.