DaVinci Resolve Tutorial
Please note, using H264 source files is not required with Resolve, but we've noticed sync issues using H265 10-bit LE encoded files, not sure if it's H265 or 10bit causing the issue. Adobe Premiere doesn't have any issues processing these exact same video files, so if you notice sync issues with Resolve the solution is likely using a source file that has a different codec or encoding type.
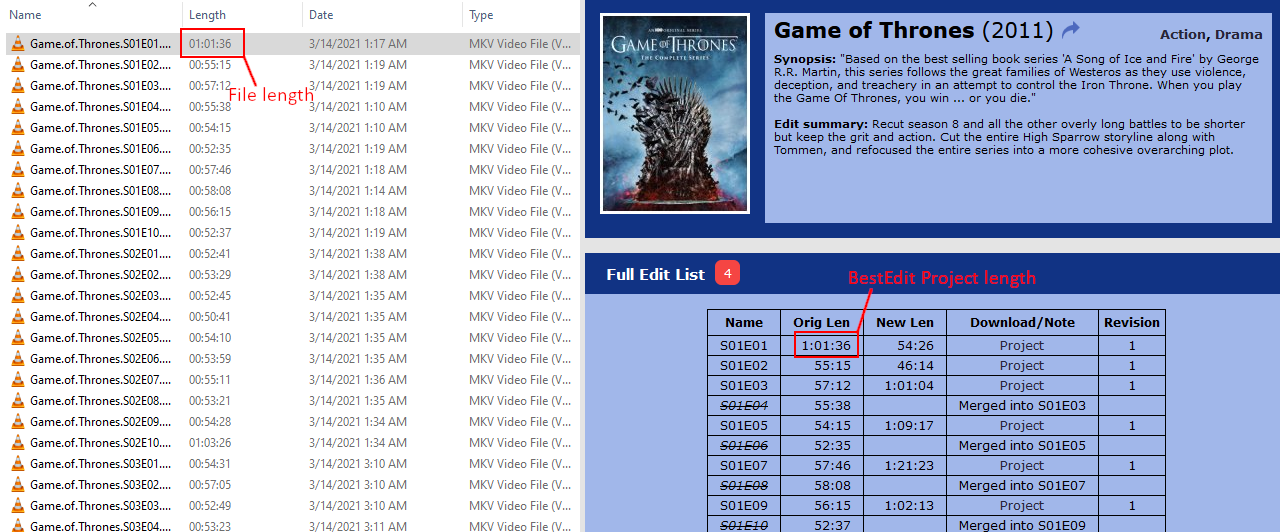
1. Make sure the Original movie/episode video file you're trying to edit is the correct length.
There is an Original length listed on each BestEdit movie/show page. You can't use an edit done on a Theatrical release to edit a Director's cut source file, you need the same release length for the edits to match up at the correct spots. (if your movie file is the right version but isn't the exact correct length you can Calibrate it to match)
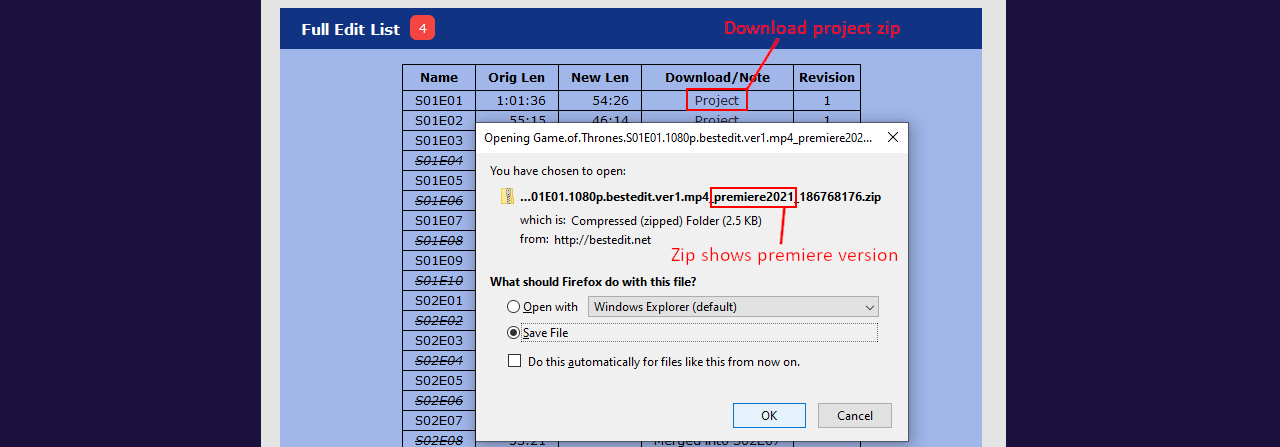
2a. Download the BestEdit Project zip file for the movie or TV show you want to watch
Please note, using Adobe Premiere is preferred, but this tutorial will walk you through how to load the project in DaVinci Resolve instead. This seems to work fine but is not as thoroughly tested as the Premiere method so there could be a small differences in the final video.
2b. Since DaVinci Resolve sometimes makes mistakes when automatically linking files, this tutorial will show you how to do it manually. You can let it search for them for you, but if there are multiple files in the project with similar names it will sometimes mix them up, and the edit won't make any sense when you encode it.
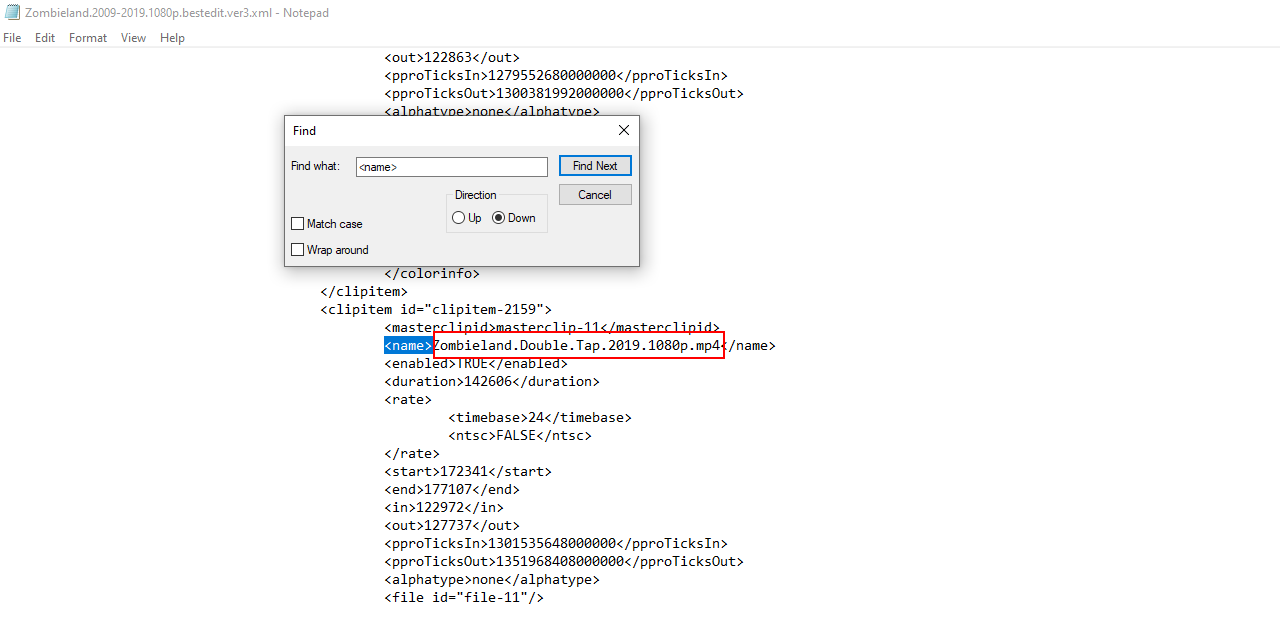
To "manually" link them properly you'll want to make sure your video files are named exactly the same as in the project. BestEdit standardizes video file names (movie.name.YEAR.1080p.mp4 or tv.show.name.S##E##.1080p.mp4), so this should be easy, but if you're ever unsure you can open the xml file in notepad or any other text editor and search for <name> to see the exact file names for yourself.
If you're using MKV files instead of MP4 files, you'll want to use notepad to replace .mp4 with .mkv in the xml file.
Please note, if you use a different resolution source video than the Project indicates (2160p video for a 1080p project), it may not work properly - we have not tested this scenario. Feel free to let us know if you try it. Some projects like The Avengers have cropping, but many do not, so this may also impact whether a project works with a different resolution source.
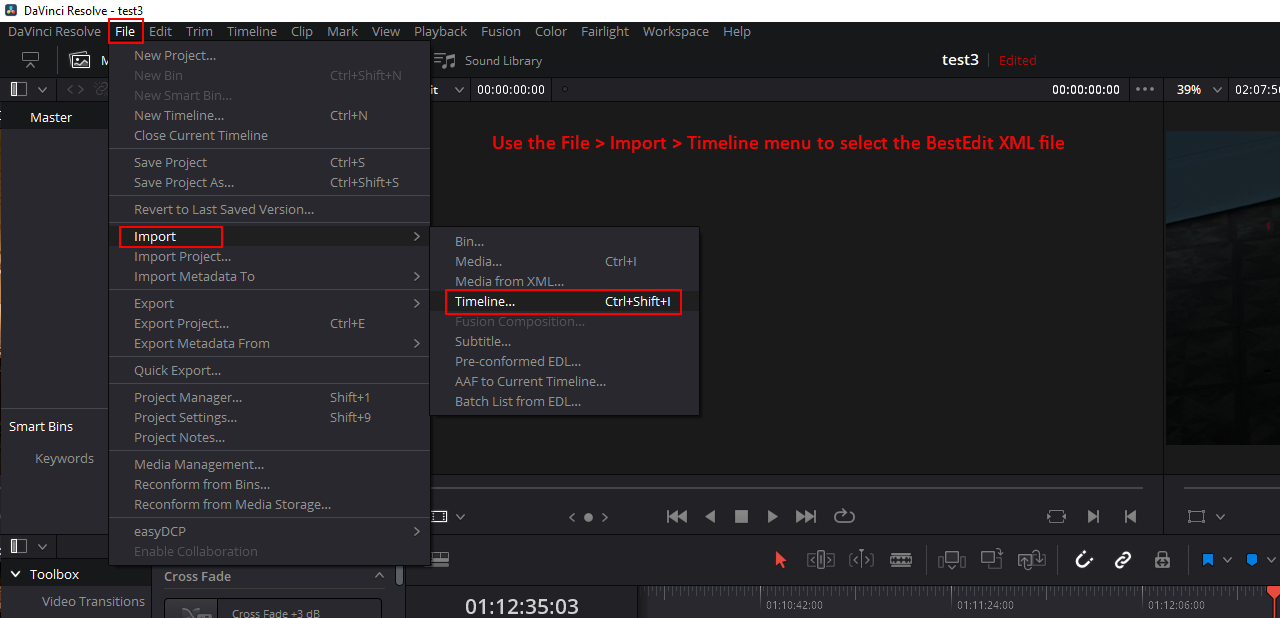
3. Unzip the BestEdit Project file use the File > Import > Timeline menu in Resolve to select and load it.
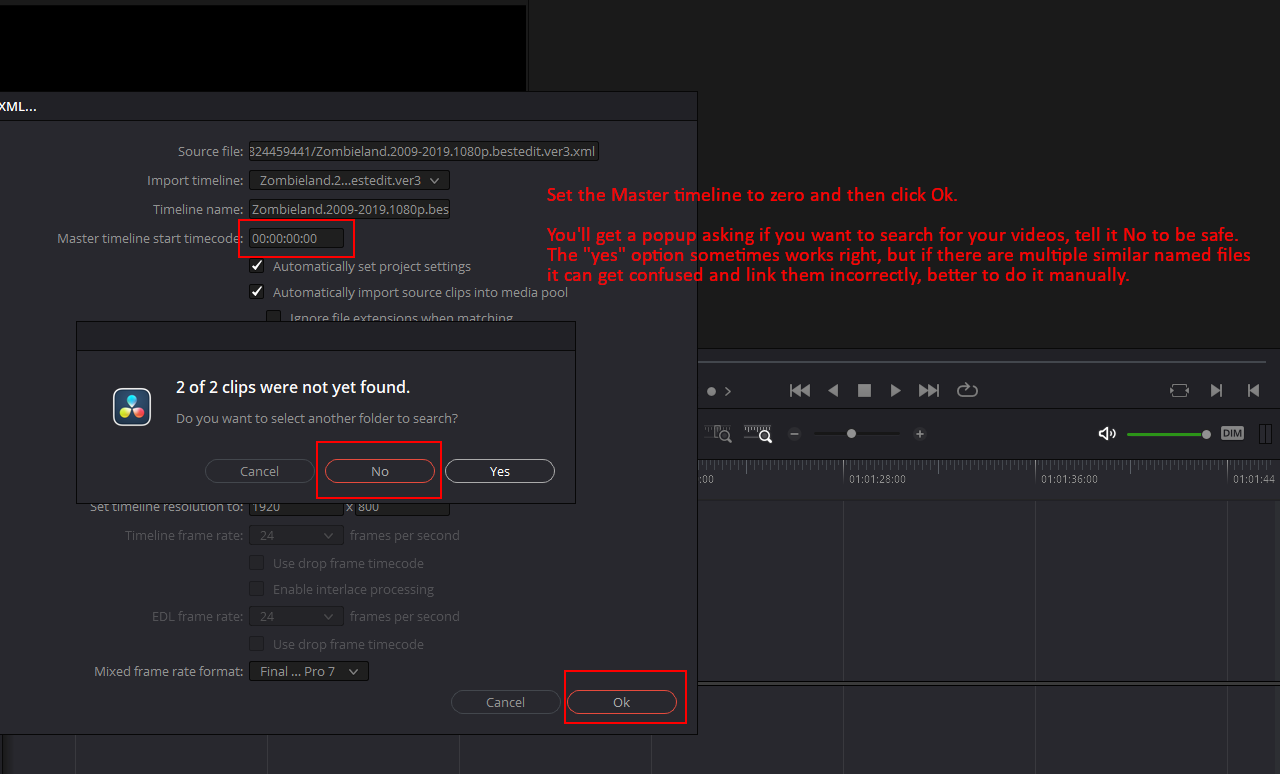
4. Zero out the Start Timecode and select any other project settings you want, then click Ok, and click No on the menu that pops up asking if you want to search for your clips.
It will pop up a bunch of messages and your timeline will be red since we haven't linked the videos yet, this is fine.
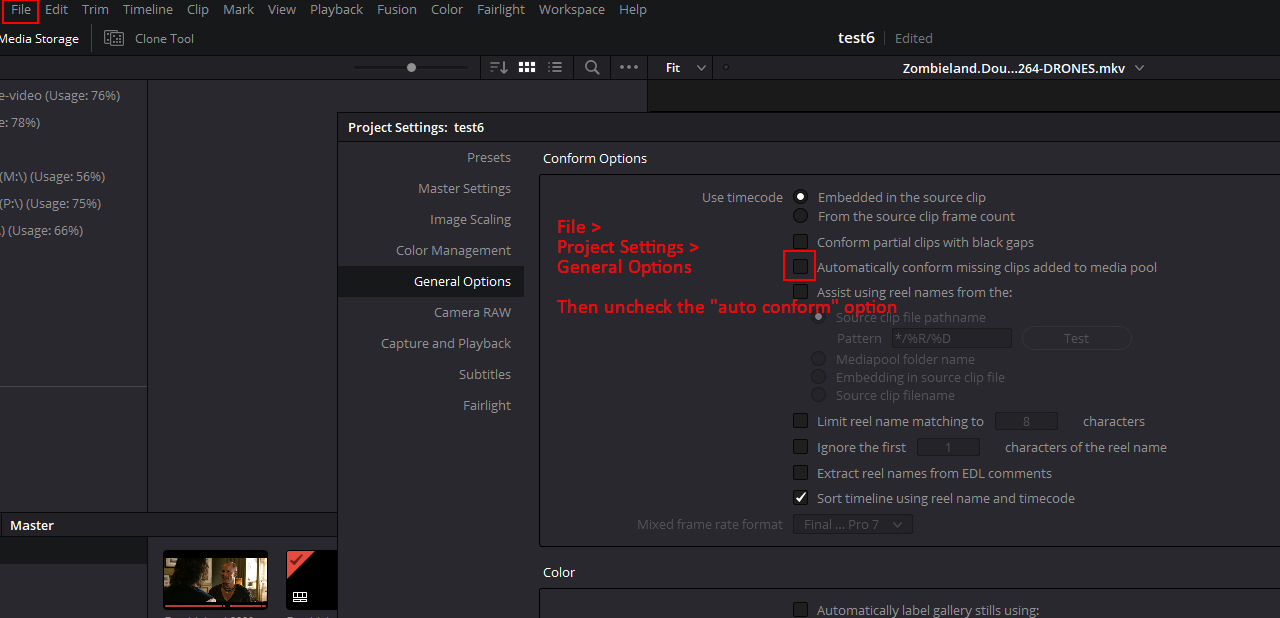
5. Go to File > Project Settings > General Options, and uncheck the option that says "Automatically conform missing clips added to the media pool"
6. Go to the Media pane, and drag your video files into the project next to your Timeline sequence. Then right-click on the Timeline and go to Timelines > Reconform From Bins
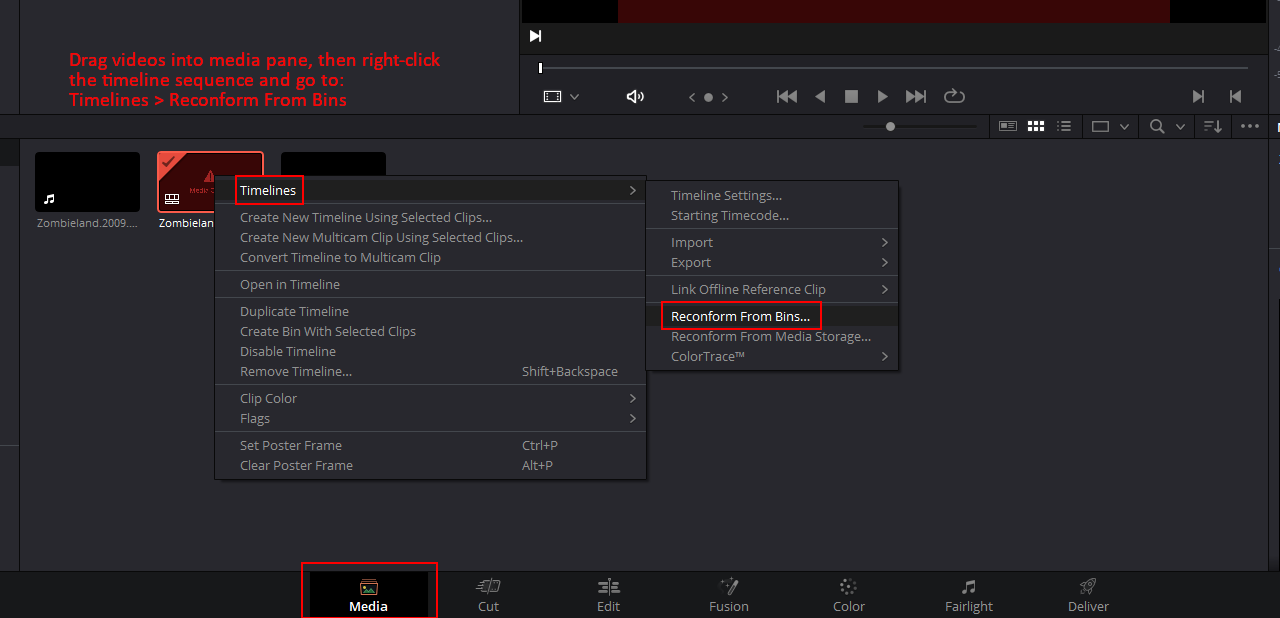
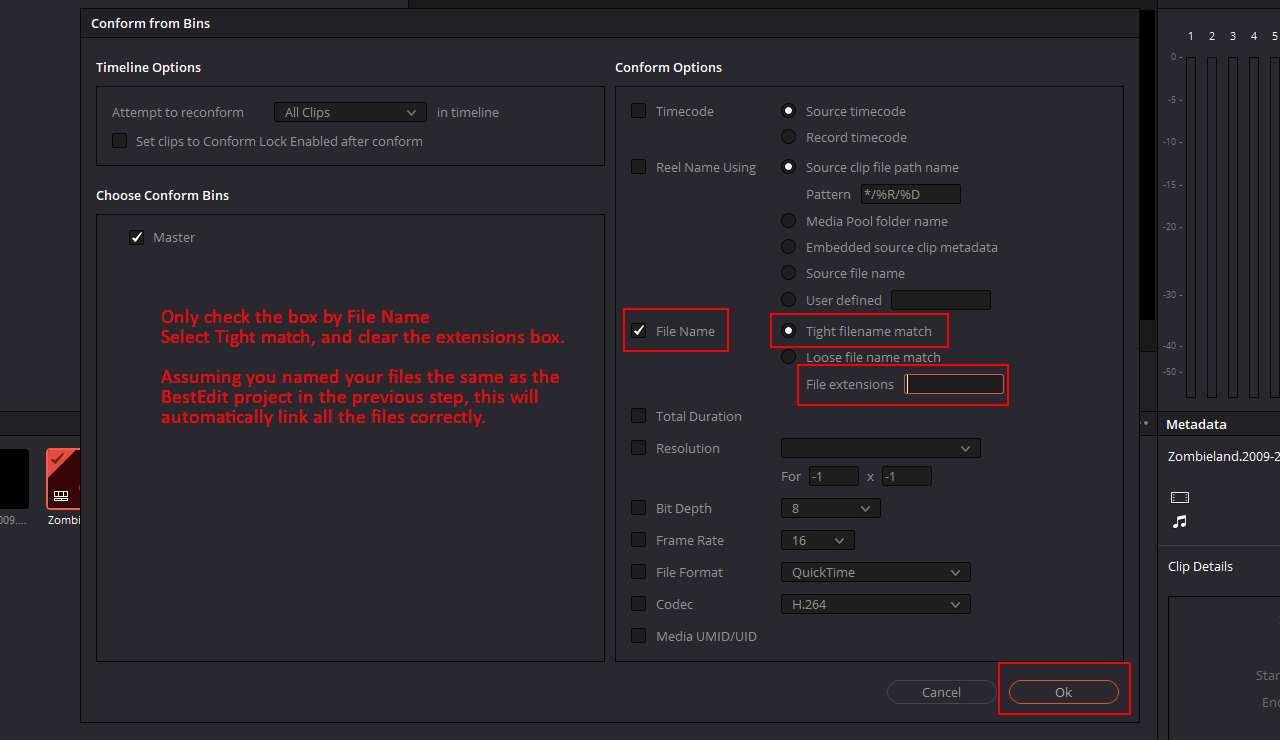
7. Make sure only File Name is checked, and Tight Filename Match is selected, and the File Extensions box is empty. Click Ok and it will re-link your video files into the project. If you did not name them exactly the same as the files in the project, as step 2b indicated, this will not work.
8. At this point you may want to hit the Edit button at the bottom to go back to your video sequence, and then check the Calibration marks to make sure everything in the project lines up correctly. This is optional, but it's a good double-check so you don't have to go back and fix anything later.
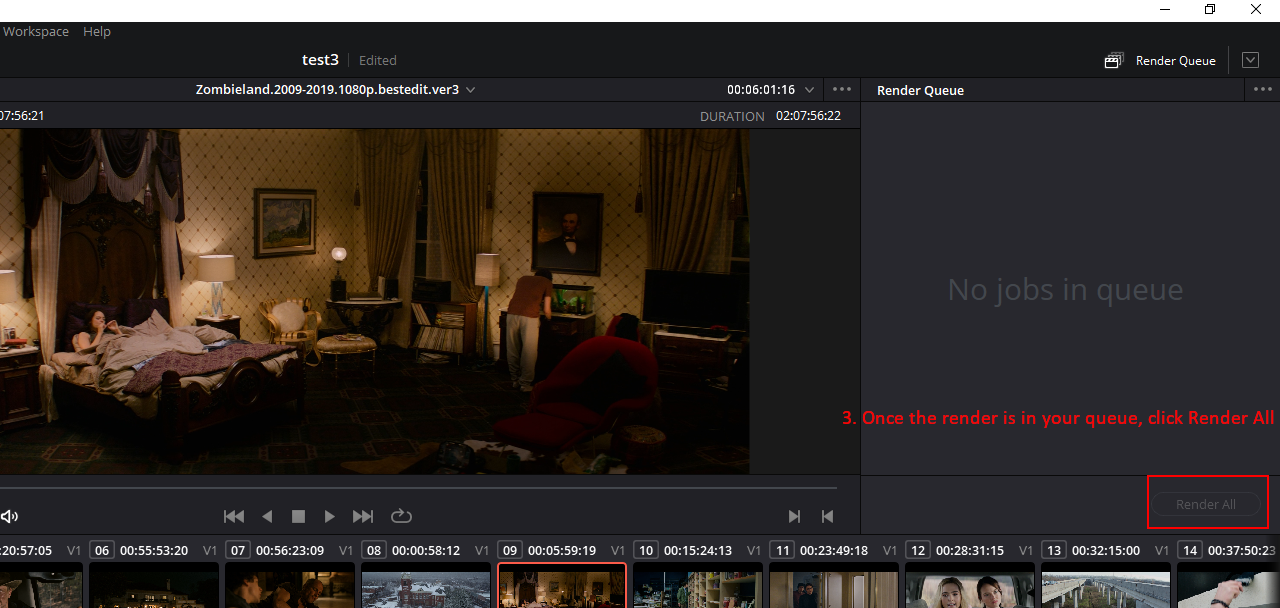
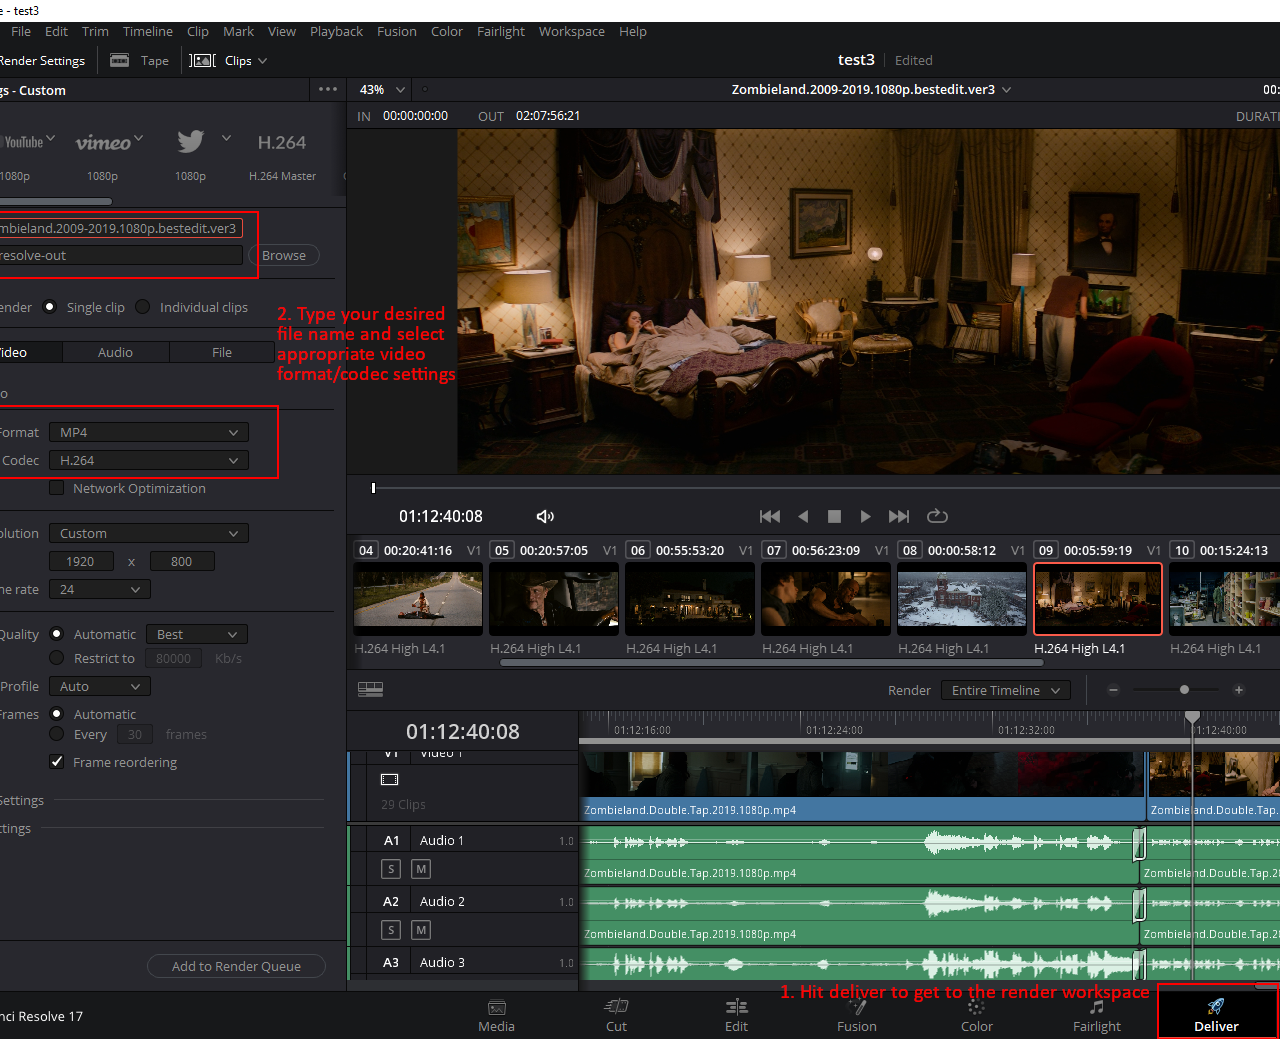
9. Hit the Deliver button at the bottom to switch to the encoding workspace and choose your output file name and format settings. Then click Add To Render Queue.
10. Click the Encode All on the encoding queue.